 Save
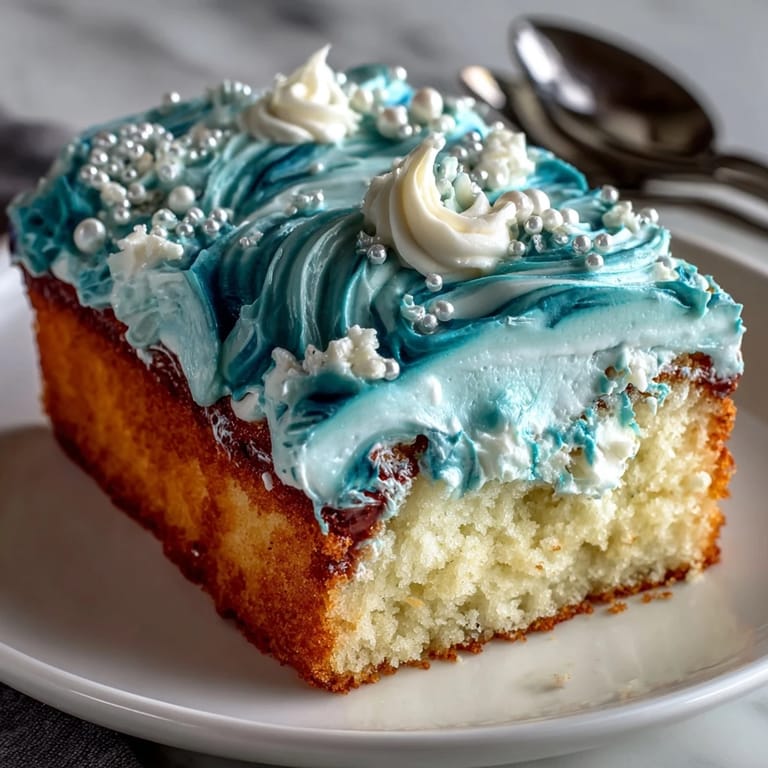
Save My friend Sarah mentioned she was a Pisces while we were scrolling through cake inspiration on her birthday, and something clicked—she needed a cake that matched her dreamy, water-loving spirit. I'd never attempted ocean wave piping before, but the idea of layering blues and whites to look like actual waves felt like the kind of challenge worth getting flour in my hair over. The vanilla sponge came together so easily that I realized the real art would be in the frosting work and trusting my hands to move like water. Watching her face light up when she saw those swooping blue layers made every slightly wobbly wave worth it.
I'll never forget my cousin leaning over the cooling cake with her phone camera ready before I'd even finished the last wave—she wanted to send it to her Pisces partner before dinner even started. There's something special about making a cake that feels this personal, where the colors and design actually mean something to the person eating it. That's when I understood why people love zodiac-themed desserts; they're not just pretty, they're a little love letter baked into buttercream.
Ingredients
- All-purpose flour (2 ½ cups): The foundation of a tender crumb; make sure it's sifted or whisked with the baking powder and salt so you don't overwork the batter when you fold it in.
- Baking powder (2 ½ tsp): This is what gives the cake its gentle rise and cloud-like texture, so don't skip it or substitute it with baking soda unless you love a denser result.
- Unsalted butter (1 cup for cake, 1 ½ cups for frosting): Room temperature butter is non-negotiable; cold butter won't cream properly and you'll end up with a grainy, sad mixture.
- Granulated sugar (1 ¾ cups): The sweetness and structure maker; creaming it with butter is where the magic happens, so don't rush this step even though it feels endless.
- Eggs (4 large): Also room temperature, because cold eggs won't incorporate smoothly and you'll end up with a streaky batter that bakes unevenly.
- Pure vanilla extract (1 tbsp for cake, 2 tsp for frosting): The flavor backbone; cheap vanilla tastes thin and flat, so invest in pure extract if you can.
- Whole milk (1 cup for cake, ¼ cup for frosting): Room temperature keeps everything at the same temperature so it blends seamlessly without breaking or looking curdled.
- Powdered sugar (5 cups, sifted): Sift it before measuring or your frosting will be gritty, which I learned the hard way when my first batch felt sandy on the tongue.
- Blue gel food coloring: Gel coloring is essential here because liquid food coloring will turn your buttercream into soup; I use varying shades from deep navy to pale aqua for that ombré effect.
- White gel food coloring: Optional but helpful for tinting that white buttercream just slightly if you want subtle dimension in the foam.
- Edible pearls (optional): These tiny sugar pearls catch the light and add a magical finishing touch that feels very ocean-inspired.
Tired of Takeout? 🥡
Get 10 meals you can make faster than delivery arrives. Seriously.
One email. No spam. Unsubscribe anytime.
Instructions
- Prepare your pan and preheat:
- Grease that 9x13-inch pan really well, then line it with parchment paper, letting some hang over the edges so you can lift the cake out later. Get your oven to 350°F so it's ready when you pour the batter.
- Mix your dry ingredients:
- Whisk the flour, baking powder, and salt together in a medium bowl, making sure everything is evenly distributed; this prevents lumps and overdevelopment of gluten when you fold it in.
- Cream butter and sugar until fluffy:
- Beat them together on medium speed for at least 3 minutes until the mixture looks pale, thick, and almost mousse-like; this traps air bubbles that help the cake rise gently. Stop and scrape the bowl halfway through so everything is incorporated evenly.
- Add eggs one at a time:
- This is tedious but worth it; each egg gets fully mixed in before you add the next one, which helps the batter stay emulsified and creamy. If it looks curdled, don't panic—the flour will help bring it back together.
- Alternate flour and milk:
- Start with flour, then milk, then flour again, ending with flour; this prevents the batter from breaking and keeps everything light. Mix on low speed just until you don't see streaks of flour anymore—overmixing develops the gluten and makes the cake tough and dense.
- Bake until a toothpick comes out clean:
- Pour the batter into your prepared pan and smooth the top with an offset spatula or the back of a spoon. Bake for 28–32 minutes depending on your oven; the cake should be golden and spring back when you touch the center lightly.
- Cool with patience:
- Let it sit in the pan for 10 minutes (this helps it set and release easier), then turn it out onto a wire rack to cool completely. Don't frost a warm cake or the buttercream will melt and slide off like it has no respect for your vision.
- Cream butter for frosting:
- Beat the softened butter on medium speed for about 2 minutes until it's pale and fluffy, which aerates it and makes the frosting lighter. This step makes such a difference in texture that it's worth not rushing.
- Add powdered sugar gradually:
- Mix it on low speed first so you don't create a powdered sugar cloud, then turn it up to medium once it's started to incorporate. Add vanilla and milk, then beat until the frosting is smooth, fluffy, and spreadable.
- Divide and tint with blue shades:
- Split the frosting into 3–4 bowls and tint each one with different amounts of blue gel coloring, creating a gradient from deep navy to pale aqua; the white portion will act as your foam. Take your time with the coloring and mix really well so you don't have streaks.
- Apply crumb coat:
- Spread a thin layer of white frosting all over the cooled cake with an offset spatula, then chill for 20 minutes so the crumbs don't mix into your final frosting layers. This step seems like extra work but it makes everything look polished and professional.
- Layer waves with an offset spatula:
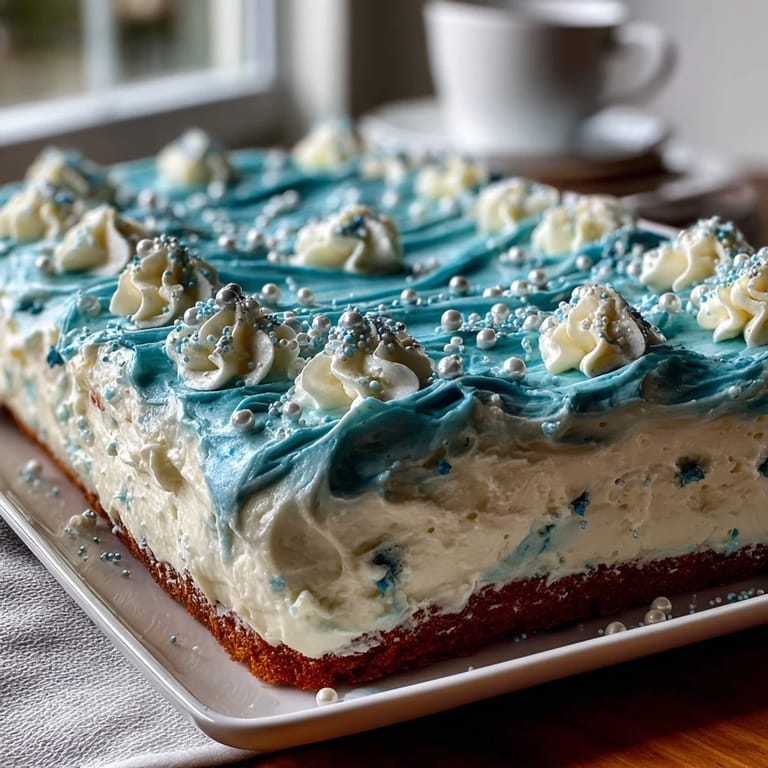
- Start at the bottom of the cake with your darkest blue frosting and use swooping, wave-like motions to create undulating bands across the cake. Work your way up to the lighter shades, letting the colors blend slightly where they meet so it looks organic and ocean-like.
- Pipe sea foam on top:
- Use a piping bag with a round or petal tip to add white frosting swirls and peaks on top of the blue waves, mimicking the look of sea foam and white-capped waves. This is where you get to be loose and playful; there's no such thing as a perfect foam.
- Add final touches:
- Scatter edible pearls across the cake if you're using them, and add a Pisces symbol made from white chocolate or fondant if you want extra magic. Chill the finished cake for at least 30 minutes before serving so the frosting sets and slicing is clean.
 Save
Save The best part wasn't even the eating—it was watching everyone at the table pause and take photos before cutting into it, like the cake was almost too pretty to disturb. That moment made me realize baking isn't just about flavor; it's about creating something that makes people feel seen and celebrated, even if just for an afternoon.
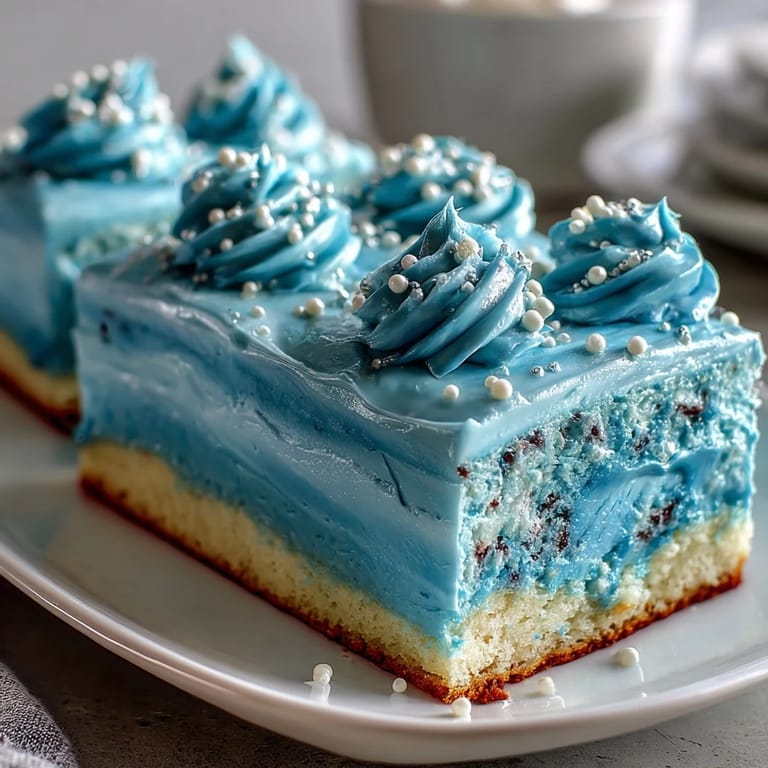
The Magic of Ombré Frosting
Creating that gradient of blues from deep ocean to pale sky takes patience and a steady hand, but honestly, the slight imperfections are what make it look like real water instead of a flat color block. I discovered that letting each layer of frosting sit for just a minute before adding the next shade gives the colors depth and prevents them from blending into a muddy middle-ground blue. The lightness of gel coloring means you can get those vibrant, clear shades that look almost jewel-like without compromising the buttercream's texture.
Flavor Variations That Work
While the vanilla sponge is perfect as written, I've experimented with subtle tweaks that make it feel even more special. Lemon zest stirred into the batter adds brightness that pairs beautifully with the buttercream sweetness, and it reminds me a little of seaside air. You could also add a touch of almond extract or even a hint of coconut for variations on the theme, though these changes are more about what feels right to you than what the cake needs.
Troubleshooting and Cake Wisdom
I've made this cake enough times now to know where things usually go sideways, and most issues are preventable with a little forethought and self-compassion. The most common problem is rushing the cooling step, which makes the frosting slide and weep instead of staying put like the calm ocean it's supposed to represent. Temperature matters in every stage of this recipe—from mixing to frosting to decorating—so if something feels off, temperature is usually the culprit.
- If your buttercream is too soft, chill it for 15 minutes and it'll firm up enough to pipe without losing the fluffy texture.
- If your waves look wobbly or imperfect, remember that real ocean waves aren't symmetrical anyway, and the imperfection is exactly what makes it look authentic.
- If you mess up a section while decorating, you can always smooth it out and start again—frosting is forgiving in a way that few things in life are.
 Save
Save This cake is a reminder that sometimes the most meaningful desserts are the ones that celebrate who the people we love actually are. Bring it to a celebration, and watch how it becomes part of the memory instead of just an afterthought.
Recipe Questions & Answers
- → How do I achieve the blue ombré effect in the buttercream?
Divide the buttercream into several portions and tint each with different intensities of blue gel food coloring, then layer them from darkest to lightest on the cake to mimic ocean waves.
- → What’s the best way to pipe the ocean waves?
Use an offset spatula to create wave shapes by sweeping the tinted buttercream in swooping motions, then pipe white buttercream on top to mimic sea foam.
- → Can I prepare the cake in advance?
Yes, bake and cool the cake completely, then chill between decorating layers to ensure clean, crisp waves and prevent melting.
- → How can I add more flavor to the sponge?
Incorporate lemon zest into the batter for a subtle citrus note that complements the vanilla base.
- → Are there any recommended tools for decorating?
An offset spatula, piping bags with round or petal tips, and a sturdy cooling rack help achieve the detailed wave design smoothly.
- → What alternatives are there for the Pisces decoration?
Instead of white chocolate or fondant, consider edible pearls, sugar decorations, or skip the symbol for a cleaner look.