 Save
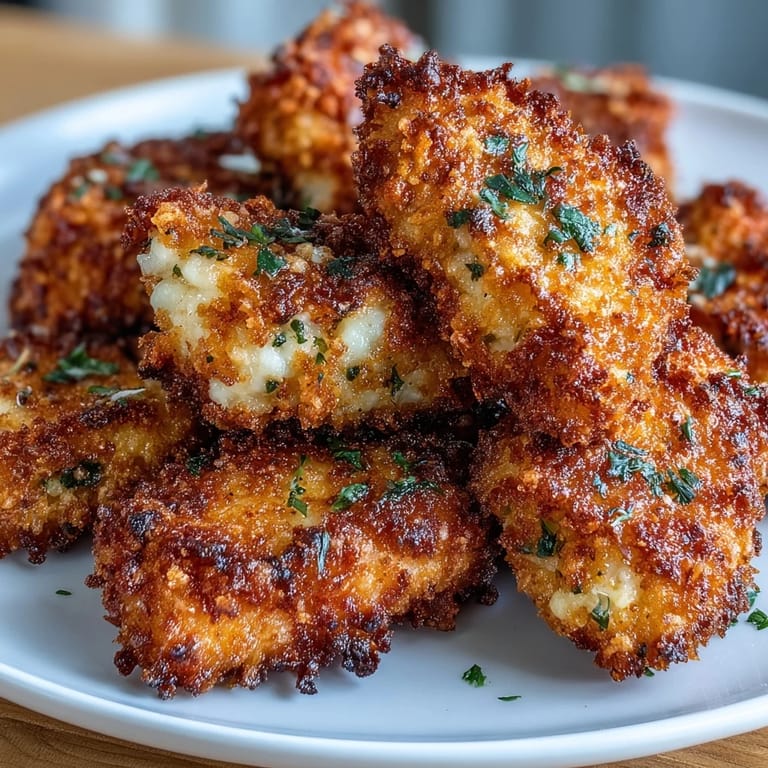
Save My coworker Sarah brought these to a potluck last spring, and I watched them disappear faster than anything else on the table—people were actually fighting over the last handful. When she told me they were just chicken, cheese, and breadcrumbs, I was skeptical until I tasted that perfect golden crust giving way to tender meat inside. That afternoon, I went home determined to crack her recipe, and now these are my secret weapon whenever I need something that looks fancy but takes barely thirty minutes.
I made a batch for my daughter's study group, and she texted me midway through: "Mom, people are asking if you catered this." Turns out the golden-brown color and that unmistakable cheesy aroma had convinced everyone they were store-bought or professionally made. Watching her realize she could impress her friends with something so simple was genuinely rewarding.
Ingredients
- Boneless, skinless chicken breasts or thighs (500 g / 1 lb), cut into 1-inch pieces: Thighs stay juicier than breasts, but both work—just don't cut them too small or they'll dry out while the coating browns.
- Salt (1/2 tsp) and black pepper (1/4 tsp): Season the chicken itself first so the flavor goes all the way through, not just on the surface.
- Panko breadcrumbs (100 g / 1 cup): Japanese panko creates that signature crispy, airy coating you can't replicate with regular breadcrumbs.
- Finely grated Asiago cheese (60 g / 2/3 cup): Grate it fresh yourself if you can—pre-grated cheese has anti-caking agents that make the coating less crispy.
- Dried Italian herbs (1 tsp, optional) and garlic powder (1/2 tsp): These add depth without overpowering the cheese, but skip them if you want the pure, salty Asiago to shine.
- Large eggs (2) mixed with milk (2 tbsp): The milk thins the egg wash just enough so the panko sticks without clumping.
- Olive oil or melted butter (2 tbsp) for drizzling: This is what transforms steamed-looking chicken into something genuinely golden and crispy.
Tired of Takeout? 🥡
Get 10 meals you can make faster than delivery arrives. Seriously.
One email. No spam. Unsubscribe anytime.
Instructions
- Get your mise en place ready:
- Preheat your oven to 425°F (220°C) and line a baking sheet with parchment paper or a light coat of cooking spray—this prevents sticking and cleanup headaches. Have all your ingredients measured and within arm's reach because once you start the breading process, things move quickly.
- Season your chicken properly:
- Toss your cut chicken pieces with salt and pepper, making sure every piece gets touched. This step takes thirty seconds and changes everything about the final flavor.
- Set up your breading station:
- Pour your egg-and-milk mixture into one shallow bowl and combine the panko, Asiago, Italian herbs, and garlic powder in another. Having these side by side makes the next part almost meditative.
- Coat each piece with care:
- Grab a chicken piece, dip it into the egg mixture to coat all sides, then transfer it to the panko bowl and really press gently so the cheese and breadcrumbs adhere. The pressing is what creates those little crispy edges you'll actually hear when you bite into them.
- Arrange on your baking sheet:
- Lay your coated pieces in a single layer—don't crowd them or they'll steam instead of crisp. They should have a little breathing room on all sides.
- Give them the oil treatment:
- Drizzle each piece lightly with olive oil or melted butter, or give them a quick spray with cooking oil. This is non-negotiable if you want that golden-brown finish.
- Bake until golden:
- Slide the sheet into your oven and set a timer for about 7 minutes, then flip each piece over and bake for another 6–8 minutes until the coating is deep golden and the chicken registers 165°F (74°C) inside. The middle of your thickest piece should feel firm when you press it.
 Save
Save My partner came home early one day and caught me pulling a perfectly golden batch from the oven—the smell stopped him in his tracks, and he asked what restaurant I'd ordered from. When I told him I'd made them, something shifted in how he thought about my cooking. It wasn't about techniques or fancy equipment; it was that sometimes the simplest combinations, done with intention, taste extraordinary.
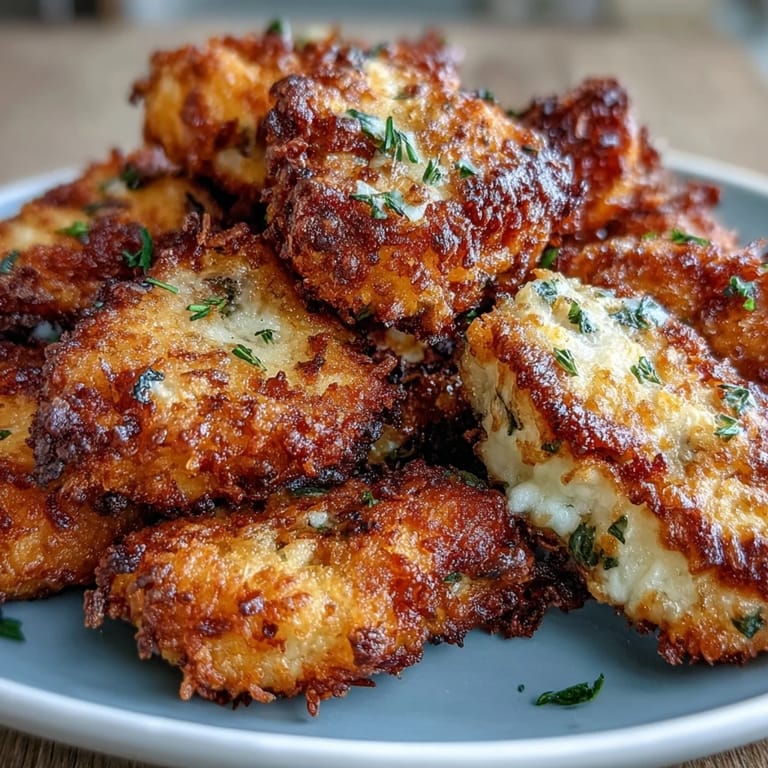
The Secret to Maximum Crispiness
If you really want restaurant-quality crispiness, here's what I discovered: brush a little extra oil on the top side right before serving. The panko crisps up beautifully in the oven, but a tiny refresh of oil after baking adds another layer of crunch that people absolutely notice. Some cooks swear by finishing these under the broiler for one to two minutes, watching carefully so the cheese doesn't char—that's the move if you like them almost crackling when you bite in.
Cheese Swaps and Flavor Variations
Asiago is my go-to, but Parmesan brings a sharper, more sophisticated bite if that's your preference, and Pecorino Romano goes almost savory-salty in the best way. I've also mixed half Asiago and half Parmesan when I had both on hand, and honestly, that combination might be my new favorite. If you're cooking for someone with dairy allergies, there are some genuinely decent dairy-free hard cheeses now that melt and crisp similarly, though I haven't tested them in this exact recipe.
Serving Ideas and Dipping Sauces
These are endlessly versatile—I've served them warm straight from the pan as an appetizer, cold the next day in lunch boxes, and even tucked into wraps with fresh greens and avocado. The marinara route is classic and foolproof, but I've also fallen in love with pairing them with garlic aioli or even a honey-mustard for something a little brighter. Ranch dip works if that's your crowd, though these are honestly good enough to eat completely plain.
- Try tossing warm bites with a light balsamic glaze and fresh arugula for an elegant salad.
- Dip them in tzatziki with fresh herbs for a Greek-inspired twist.
- Make a quick buffalo ranch by mixing hot sauce into your dip for something with a little kick.
 Save
Save These bites prove that you don't need complicated techniques or obscure ingredients to cook something that feels special. Once you've made them once, you'll understand why they disappeared so fast at that potluck.
Recipe Questions & Answers
- → Can I fry these instead of baking?
Yes, you can fry these chicken bites. Heat oil to 350°F and fry for 3-4 minutes until golden and cooked through. Drain on paper towels before serving.
- → What cheese works best as a substitute?
Parmesan or Pecorino Romano make excellent substitutes. Both provide similar salty, nutty flavor profiles that pair wonderfully with the panko coating.
- → How do I store leftovers?
Store cooled chicken bites in an airtight container in the refrigerator for up to 3 days. Reheat in a 375°F oven for 8-10 minutes to restore crispiness.
- → Can I freeze them before cooking?
Absolutely. Arrange coated pieces on a baking sheet and freeze until solid, then transfer to a freezer bag. Bake from frozen, adding 5-7 minutes to the cooking time.
- → What dipping sauces pair well?
Marinara, ranch dressing, honey mustard, or garlic aioli are classic choices. The cheesy, savory bites also complement sweet chili sauce or tangy barbecue sauce.