 Save
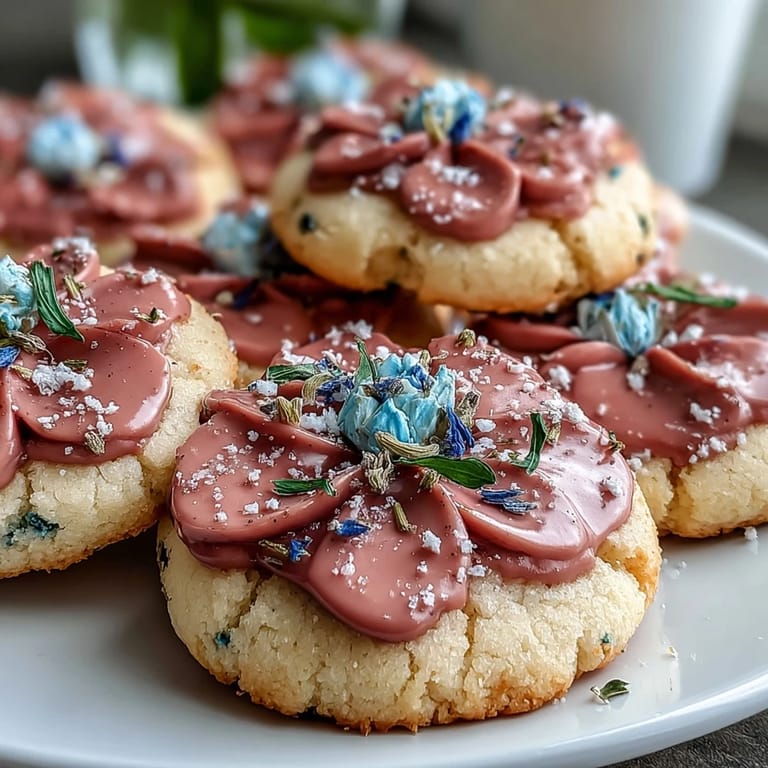
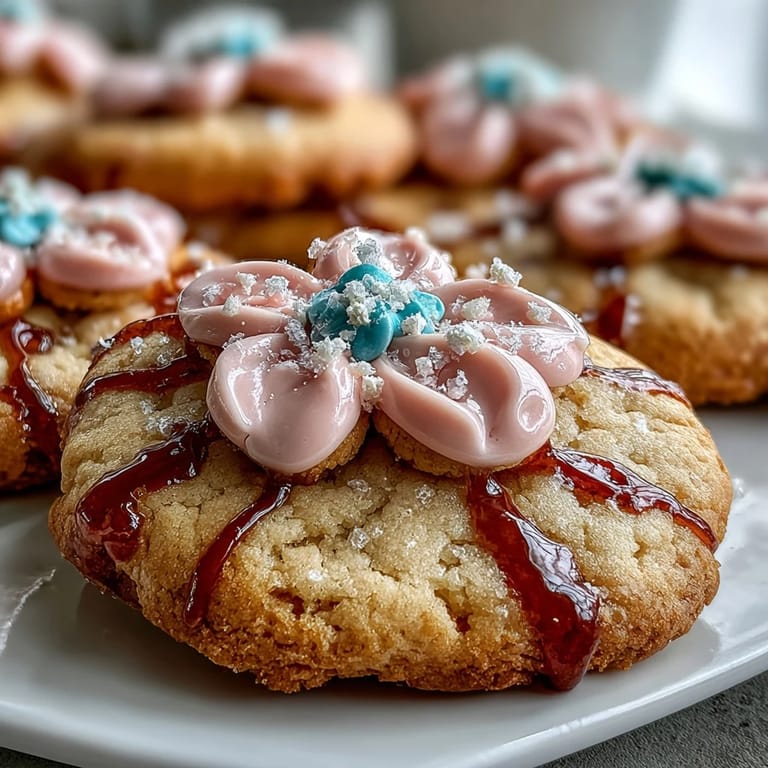
Save My sister called me three weeks before her baby shower in a slight panic, asking if I could make something that looked as sweet as the occasion felt. I found myself standing in my kitchen on a gray Saturday afternoon, thinking about how cookies shaped like flowers seemed like the perfect answer—delicate, cheerful, and honestly, just the right amount of fussy without being impossible. These pastel icing-topped blooms became the star of her day, and I've made them countless times since for every spring gathering and celebration that's crossed my calendar.
I'll never forget watching my sister's guests light up when they saw the tiered display of these cookies at her baby shower. One elderly aunt actually took a photo before eating hers, which I found oddly touching—these little flowers had become part of someone's memory that day, and that shift from simple dessert to meaningful detail is what keeps me coming back to this recipe.
Ingredients
- All-purpose flour (2 1/2 cups): This is your structure, so measure it by spooning into your measuring cup rather than scooping directly from the bag—it prevents packing and keeps your cookies tender instead of dense.
- Baking powder (1/2 teaspoon): Just enough to give the cookies a gentle lift without making them cake-like or cakey.
- Salt (1/4 teaspoon): This small amount brightens the sweetness and deepens the buttery flavor in ways people can't quite name.
- Unsalted butter (3/4 cup, softened): Room temperature butter is non-negotiable here—cold butter won't cream properly with the sugar, and you'll end up with dense cookies instead of light ones.
- Granulated sugar (3/4 cup): The sweetness backbone, beaten with butter until it becomes pale and fluffy, which incorporates air into your dough.
- Large egg (1): Brings moisture and structure—room temperature eggs blend more evenly into the wet ingredients.
- Pure vanilla extract (2 teaspoons): Use real vanilla, not imitation, because the flavor difference shows up even through the icing.
- Powdered sugar (3 cups, sifted): Sifting matters because even tiny lumps will cause your royal icing to be gritty and disappointing.
- Meringue powder (2 tablespoons): This stabilizes the icing and gives it that signature glossy finish that hardens beautifully.
- Water (4 to 5 tablespoons): Add it gradually—you want icing that spreads smoothly without being runny.
- Food coloring gels in pastel shades: Gel colors are more concentrated than liquid, so your icing stays the right consistency while achieving those dreamy soft hues.
Tired of Takeout? 🥡
Get 10 meals you can make faster than delivery arrives. Seriously.
One email. No spam. Unsubscribe anytime.
Instructions
- Prepare your dry ingredients:
- Whisk together flour, baking powder, and salt in a medium bowl, then set it aside—this prevents overmixing later and ensures even distribution of the leavening agent throughout the dough.
- Cream the butter and sugar:
- Beat softened butter and granulated sugar together for 2 to 3 minutes until the mixture transforms into something pale, fluffy, and noticeably lighter in color. This is where you're incorporating air, which makes the cookies tender.
- Add the egg and vanilla:
- Beat in the room-temperature egg and vanilla extract until everything is well combined and smooth—this takes just a minute or two of mixing.
- Bring wet and dry together:
- Gradually add the flour mixture to the creamed butter and sugar, mixing just until the dough comes together—stop as soon as you don't see any white streaks of flour, because overworking develops gluten and toughens your cookies.
- Chill the dough:
- Divide the dough in half, flatten each into a disc, wrap tightly in plastic, and refrigerate for 1 hour—this resting period relaxes the gluten and prevents excessive spreading during baking.
- Prepare for baking:
- Preheat your oven to 350°F and line two baking sheets with parchment paper while the dough chills, so you're ready to go the moment it's cold enough to roll.
- Roll and cut your flowers:
- On a lightly floured surface, roll one chilled dough disc to 1/4-inch thickness, then cut out flower shapes with your cookie cutter—you'll likely need to re-roll scraps once to use all the dough.
- Space and bake:
- Place cookies about 1 inch apart on your prepared sheets, then bake for 10 to 12 minutes until the edges are just golden but the centers still look slightly underdone. Let them rest on the hot sheet for 5 minutes before transferring to a wire rack to cool completely.
- Make the royal icing:
- Sift powdered sugar and meringue powder together, then add water 1 tablespoon at a time, stirring until you have a smooth consistency that's thick enough to hold a peak but still spreadable—this takes a bit of feel, so go slowly.
- Tint and decorate:
- Divide the white icing into small bowls and tint each with just a tiny drop of pastel gel color at a time—these colors are potent, and you can always add more. Spread or pipe onto completely cooled cookies, then let the icing set for several hours before serving or storing.
 Save
Save There's something about standing in your kitchen piping tiny pastel flowers onto cookies that feels meditative and purposeful. I've learned that baking these isn't about achieving perfection—it's about showing up with care for someone else's moment.
Flavor Variations That Work
After my first batch, I started experimenting with subtle additions to the dough that shifted the entire flavor profile without changing the texture. A drop of almond extract in the dough brings a delicate sophistication that pairs beautifully with the pastel icing, while a tiny pinch of lavender powder in the dough itself creates something unexpectedly elegant. I've also tried swapping half a teaspoon of the vanilla for lemon zest, which gives the cookies a fresh brightness that works especially well for spring celebrations.
Decorating Beyond the Basics
The icing is your canvas, and the beauty of royal icing is that it dries hard and glossy, so you can get as detailed or as simple as you want. I've learned that piping bags with small round tips let you create tiny dots and lines, while a small offset spatula is perfect for smooth, elegant swirls that look intentional but forgiving. Some of my favorite finishes have been monochromatic—using just one pastel shade per batch and varying the application techniques so each cookie looks slightly different but cohesive, which somehow feels more sophisticated than a rainbow approach.
Storage and Gifting
These cookies stay fresh and beautiful for days when stored in an airtight container, layered between parchment paper so the icing doesn't stick to anything. I've found that they actually travel well in boxes or tins, making them perfect gifts because they look intentional and special without requiring last-minute assembly. If you're planning ahead, you can even bake and decorate these a full week in advance, which takes so much pressure off when you're juggling event planning and cooking.
- Store in airtight containers at room temperature for up to five days, or freeze the undecorated baked cookies for up to three months.
- Let royal icing set for several hours (or overnight) before stacking or packaging to prevent smudging.
- Pair these with sparkling lemonade, herbal tea, or hot chocolate depending on the season and occasion.
 Save
Save These flower cookies remind me that sometimes the most meaningful things we make are the small, intentional gestures—a box of homemade sweets offered to someone celebrating something important. They're worth the hour of gentle work.
Recipe Questions & Answers
- → What gives the cookies their delicate texture?
The combination of softened butter and proper chilling of the dough results in tender, delicate cookies with a light crumb.
- → How is the pastel icing made smooth and spreadable?
Mixing powdered sugar with meringue powder and gradually adding water creates a thick, smooth royal icing ideal for decorating.
- → Can I add flavor variations to the cookies?
Yes, adding a drop of almond extract to the dough provides a subtle, complementary flavor twist.
- → What tools are recommended for decorating the cookies?
Piping bags with small round tips help create detailed flower designs with the pastel icing.
- → Are there dairy-free alternatives for these cookies?
You can substitute plant-based butter to make the cookies suitable for dairy-free diets.
- → How should the cookies be stored after decorating?
Let the icing set completely before storing cookies in an airtight container at room temperature to retain freshness.