Save
Save Truth be told, the first time I made spring onion pancakes, it wasn't a planned affair—just a sudden craving on a rainy afternoon, the kind that calls for something both crispy and chewy. The hiss of the pan and the sharp, grassy scent of scallions instantly lifted my mood. One pancake led to the next, and before I knew it, the kitchen smelled like a busy sidewalk in Shanghai. There's a quiet satisfaction in peeling apart the flaky layers, each mouthful a mix of crunch and savory warmth. Frankly, making these by hand has become a kitchen ritual for those unexpected snack attacks.
Once, I made these for my roommate's birthday after we both arrived home late, giggling and hungry, with only spring onions and flour to spare. She said, between bites, that it tasted like a festival food stall, and that may be the best compliment any midnight snack could hope for.
Ingredients
- All-purpose flour: Sift it if you want your dough silky, but any basic flour works—I've even gone half and half with whole wheat for nuttiness.
- Boiling water: Pour it steadily and stir quick; it helps with chew and makes the dough wonderfully pliable.
- Cold water: Finishes bringing the dough together—keep it chilled for a better bite.
- Salt: Don't skimp; it wakes up both dough and filling, and I've learned not to rush this step.
- Spring onions (scallions): Use both green and white parts—there's no waste, and it lends a subtle sweetness.
- White pepper (optional): Just a pinch gives a gentle heat, though black pepper works if that's all you have.
- Vegetable oil: Go for something neutral; brush generously for that signature crispy layer.
Tired of Takeout? 🥡
Get 10 meals you can make faster than delivery arrives. Seriously.
One email. No spam. Unsubscribe anytime.
Instructions
- Make the dough:
- In a large bowl, stir flour and salt then stream in boiling water—watch the steam rise—until the mix looks shaggy, then add cold water and knead until the dough smooths out under your hands. Cover it with a damp cloth and let it rest while you prep the filling; this makes rolling so much easier.
- Divide and shape:
- Slice the dough into four pieces and roll each into a compact ball, feeling its plushness as you go.
- Layer in the flavor:
- On a floured board, roll out a ball into a thin, wide rectangle, slick it lightly with oil, then shower on salt and a handful of those crisp, fresh spring onions.
- Spiral and flatten:
- Roll the sheet up into a log—like making cinnamon rolls—then coil that log into a tight spiral, tuck the loose end under, and gently smush it flat.
- Press into pancakes:
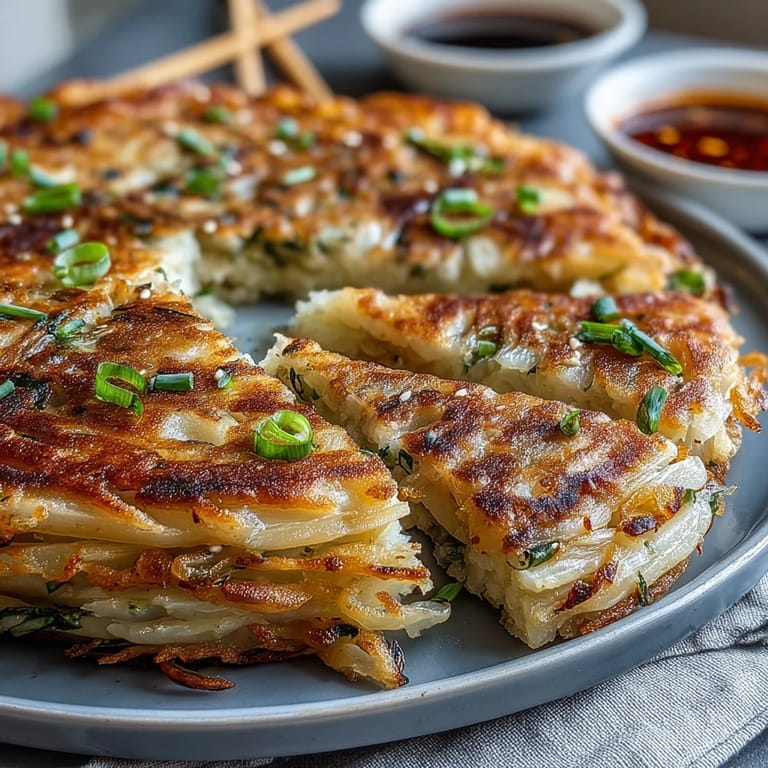
- Press and roll each spiral into a disc about six inches wide; you’ll see swirls of green peeking out.
- Crisp and cook:
- Warm a slick of oil in a nonstick skillet over medium; lay in a pancake and listen for the gentle sizzle, frying for about two minutes per side until gloriously golden—repeat for the rest.
- Rest and serve:
- Set each pancake on paper towels to soak up excess oil, then slice into wedges and serve hot with your favorite dipping sauce.
 Save
Save 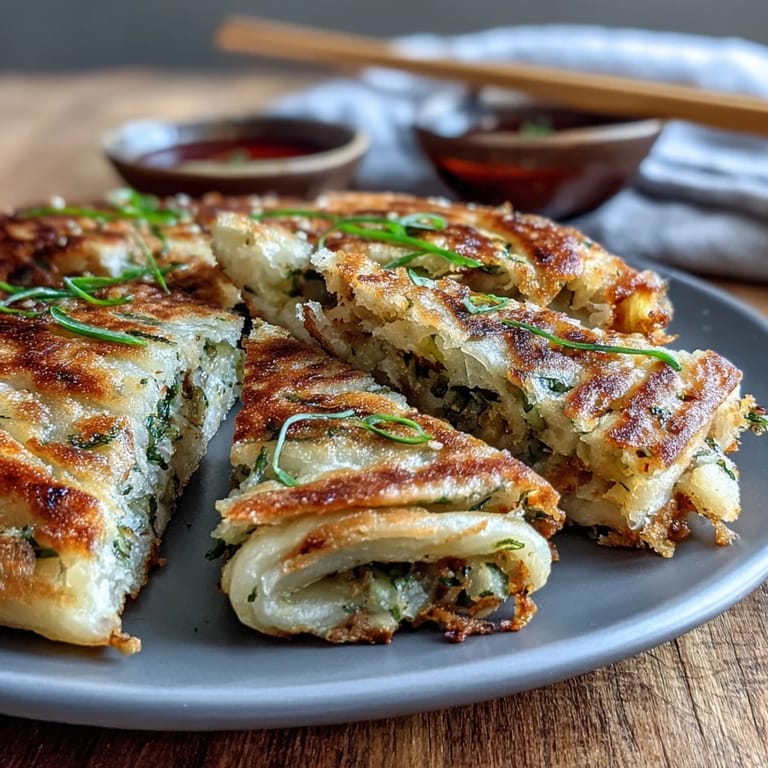 Save
Save One rainy Sunday, I brought these pancakes out to my balcony with a tiny bowl of soy sauce—no plates, just slices in my hand, street market style. For a moment, it felt like the whole city was sharing this humble snack with me, bites chased by laughter and the tap of rain.
How to Get the Flakiest Layers
It’s the rolling and re-rolling that banks those shattering, crisp layers—resist the urge to skip steps. Each time you slick with oil and coil the dough, you’re stacking up flavor and crunch. If you’re patient and a bit generous with the oil, you’ll taste the difference right from that first bite.
Choosing and Caring for Spring Onions
The freshest spring onions make a world of difference—look for perky greens and no wrinkling. Give them a rinse and pat dry thoroughly, since any leftover moisture can steam inside the dough. I’ve even stashed sliced onions in the fridge a day ahead to save time, and they keep their crunch just fine.
Perfecting Your Fry
I always heat my pan just a bit longer than feels necessary, so the pancakes hit a true sizzle the moment they go in. A medium nonstick skillet is ideal, but cast iron works in a pinch; keep an eye so they don’t burn. Each pancake loves its own space—don’t crowd the pan.
- Keep a pastry brush handy for easy oiling.
- Slice pancakes into wedges before serving for grab-and-go snacking.
- Leftovers reheat best in a dry skillet to restore their crispiness.
 Save
Save  Save
Save Now, whenever I crave something savory and satisfying, these pancakes are my favorite standby—quick enough for a snack, special enough for company. I hope your kitchen fills with the same warmth and snap of fresh spring onion as mine does.
Recipe Questions & Answers
- → How do I get layers that flake?
Brush each rolled sheet generously with oil before adding scallions and rolling. The oil separates layers during coiling and rolling, yielding distinct flaky strata once fried.
- → Can I make the dough ahead?
Yes. After kneading, wrap and refrigerate for up to 24 hours. Bring to room temperature before rolling and proceed with the layering steps to maintain tenderness.
- → What’s the best oil for frying?
Use a neutral oil with a high smoke point, such as vegetable or canola oil. A light layer in the pan gives an even, golden crust without overwhelming the scallion flavor.
- → How thin should I roll each disc?
Roll each disc to about 1/8 inch (3 mm) for crisp edges and tender layers. Thinner rolling yields more crispness; slightly thicker gives a chewier interior.
- → How do I reheat leftovers for best texture?
Reheat on a dry skillet over medium heat, flipping until both sides crisp again. Avoid microwaving, which softens the layers and loses flakiness.
- → Any good variations for the filling?
Add finely chopped garlic, toasted sesame seeds, or a pinch of white pepper to the scallions for extra aroma. Small amounts keep the layers intact while boosting flavor.